Tuesday, February 7, 2012

The More Things Change, The More They Stay The Same

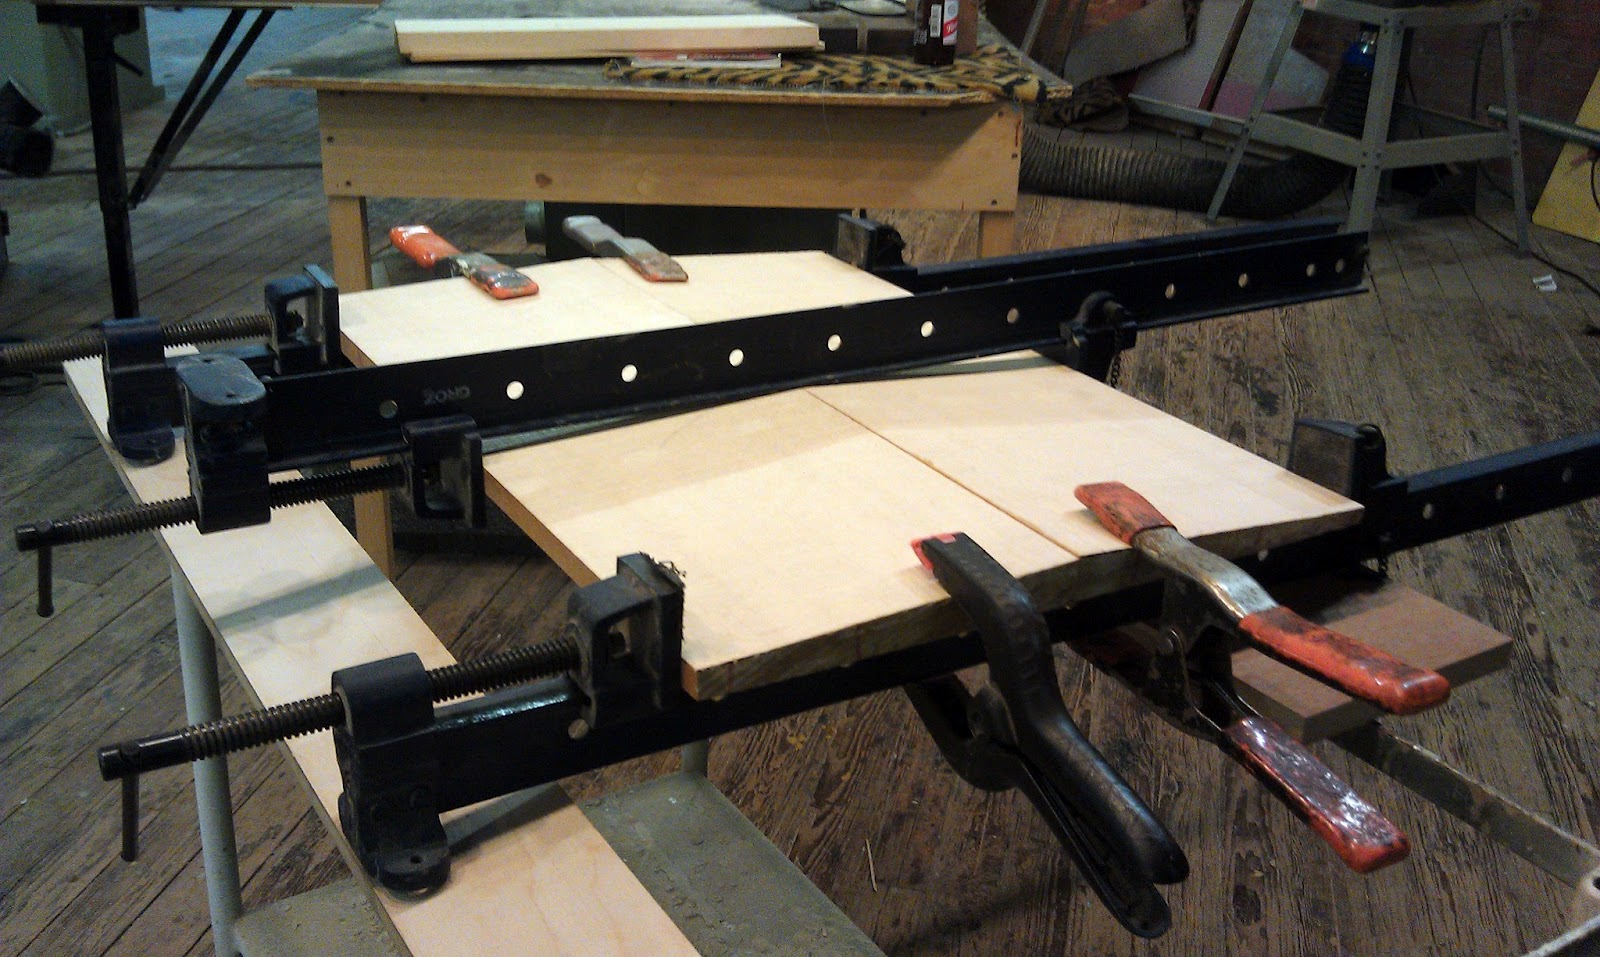
Cutting out the top on the scroll saw
And the process continues as though it never stopped. I'm working on a different guitar now and there are many differences in the process, but the thing that hasn't changed is the feeling I get from working on it. One moment I'm the master luthier perfecting my craft. The next, I'm the idiot that can't even figure out how to turn on a power tool. Guess which description is more accurate! But that's okay. I'm learning.

Even today, I was reminded of one of the things that made me want to do this again. It's the ebb and flow of the process: one moment you have a chunk of wood in your hand and the prospect of a year-long slog in front of you. The next moment you're knee deep in one monotonous task or another that seems as though it might never end. But, then, before you even have a chance to shake yourself from your trance, you find yourself holding a piece of wood with a soft curve, a slope and a contour very much like an archtop guitar - or at least reminiscent of it.

So we're already in the thick of it and we're making good progress. The techniques of building the archtop are definitely different, but I feel much more comfortable with some of the basics, like carving with a chisel, than I was a year ago. And don't get me wrong: there's no possibility of my being mistaken for a master woodworker anytime soon, but now that I know an amateur like me can make a decent guitar, it's a lot less intimidating.

Carving the top
As usual, we've been working on several tasks at once, but in the first three classes of the new session we've covered some important territory. My top and back have been sanded to the proper thickness and glued up, I bent one of my sides tonight, and not only did I cut the top to shape, but I even started carving it. And that's the real news.

I was reminded tonight about how much I enjoyed the carving I did on my other guitar. But since this is an archtop, there will be much, much more of it, and I'm glad about that. Of of the great things about building a guitar is the variety of tasks involved. Some are heavy on details and some aren't. Some require intense focus and others require great creativity. I find carving to be one of the most satisfying parts because there's no formula to guide you. It's all about using your senses and your intuition to guide you to just the right shape, the right weight and, most importantly, the perfect sound.

Thursday, January 26, 2012

Chapter Two: The Archtop

Gluing the Sitka Spruce top
Well, here we are again. I'm not sure who is the bigger glutton for punishment here: me for building another guitar or you for continuing to read my blog. But here we are, so I might as well get on with it.

This project has been brewing for quite a while now, since sometime last year when I and several classmates decided to build an archtop. Actually, we first decided it would be a good idea to build a mandolin and we were very excited about that. I couldn't wait. I figured it would be a good motivation to learn to play more than a few chords badly and, besides, I would never be able to afford to buy a good mandolin, so here was my chance. Then someone said, "you know, there's really not much difference between a mandolin and an archtop guitar." Well, that was the end of that. It was then that we decided that a couple of us would make mandolins and a couple would make archtop guitars since, as Ted pointed out, the process is very much the same. So my class from last year is intact, and we've added a couple of people, Will and Rob. More on them later.

So for those avid readers of my blog who aren't familiar with guitar types, two of the most prominent are flat tops and archtops. Flat tops are the most common these days, and include dreadnoughts like the one I just finished making, but also classical guitars, and many other shapes and sizes. The main thing of course, is that the top of the instrument is flat. (Or, as you may recall from one of my first posts, almost flat, since there's actually a slight radius on it). An archtop, on the other hand has - you guessed it - an arched top, which is made by actually carving an arched shape out of a fairly thick piece of wood as opposed to simply using a relatively thin, flat piece as you would with a flat top.

Some would say archtops are much more difficult to make (and the prices you pay for good archtops, which often get well over $10,000 for even a decent professional model, bear that out), but others would differ with that opinion. In any event, the process is very different.

In the end, the main difference between flat tops and archtops aside from their construction is the way they're used. To make a big generalization, these days flat tops are generally used for bluegrass, country, folk, rock - most popular music, in fact. On the other hand, most jazz players use archtops and a jazz club is where you will most often find them, although they're also used by blues players and many others. It's certainly not uncommon to find one in a rock band. There's much more history to it, of course.

So we have two classes under our belts now and we've made good progress already. Our tops have been planed to the proper thickness and the two book-matched parts glued together; the backs have been chosen; and several other preparatory steps are behind us. We'll be bending sides in the next week or two, so we're moving right along.

I'm excited about the wood and some special plans for my new guitar, but I'll save that one for next time. Until then...

Wednesday, January 25, 2012

The Flat Top: Epilogue


I sat down to write this post at least five or six times over the past few months, but I'm glad I didn't. I don't recall which would have been the high points or the low ones on the roller coaster of joy and sorrow, but I'm certain that I've finally achieved the proper balance, or at least as close to that point as I'm likely to get anytime soon.

And since, as you'll soon learn, I'm about to subject you to another dozen months or so of my lutherial blather (no, it's not a word, but I don't care), I'll try to give you the short version of the story.

The first point I'd like to make is one pertaining to the process of making a guitar: That is that on the day I called my guitar finished (November 22, 2011), I was definitely not finished.  In retrospect I realize that everyone who has ever built a guitar knows this. It boils down to the simple reality that the wood in a recently completed guitar is still coming to terms with what it has become. It takes a little time to get used to the notion. As a result, it moves and swells and contorts in all kinds of crazy ways, which makes adjusting it a bear. On top of that, as many years as I've been playing the guitar I had no idea how important the setup of the instrument was. I didn't realize that a small adjustment of the bridge here and a minute adjustment of the neck there can change the guitar from an absolute dud to a masterpiece....and, unfortunately, vice versa.

Suffice it to say I experienced several rounds of both. And I won't go into how frustrating that was. Just know that it would take me a while to find the words to describe it.

And then, of course, just when it's perfect, the unthinkable happens. Your bridge begins to come off. It's not fun. It's very, very depressing. First you can deny it. Then you can convince yourself it's just going to come up a little and it can be glued back down. Finally you admit what should have been obvious. It's coming up and there's nothing to stop it.

But then a very funny thing happened. I quickly realized that I, John Harris, built a guitar. If I can build a guitar, how difficult can it be to make what is basically a pretty simple repair? So I did. With a little advice from Ted, I heated it up so the glue would soften, then used a kitchen spatula to carefully work it off of the top. Then I cleaned it up, made some slight adjustments to its shape, and glued that sucker back on. The whole process took a couple of hours. And now it's good as new. Relief!

That was a few days before New Years, so I've been living with it for almost a month now, and with a little time to get away from it all, here's what I have to say about my guitar, using as much objectivity as I can muster: I love my guitar. I love playing my guitar and I can honestly say it would serve me extremely well if it was the only guitar I could ever play again. Is it the best guitar I've ever played? No, it's not. Does it have the potential to be? Well, I think that would be a real stretch, but knowing what I know now, I do believe it can be better. There are more adjustments required and, as most people know, almost all guitars improve dramatically in the first years after they're built. So the bottom line is that I built a guitar that is far better than I ever could have imagined. It's not perfect, but it's good enough that I feel compelled to do it again.

So, with that, I end the first chapter of my guitar building adventure and begin the second. See you in chapter two!

Wednesday, November 23, 2011

That's All She Wrote

Finished on November 22, 2011
It figures. Since I started working on my guitar over a year ago it's been like this. One day everything falls into place so perfectly that it's hard to imagine that anything could stand in the way of finishing the perfect guitar in record time. A week later it feels as though significant progress is a thing of the past and the rest of the process will be nothing but a miserable slog.

I'm very happy to say that yesterday was the former. After struggling mightily with my setup for the past week, I walked into class yesterday praying I could get to at least a reasonably good place with my guitar before Natalie and I left for Birmingham for Thanksgiving. All I wanted was to be able to take it along and feel it was getting closer to being finished. But I was in class for only a half hour before I realized it: Today was the day. Not only was I going to be finished, but I was going to leave class with a real guitar - not just one that I would be proud of because I built it, but an honest to goodness excellent instrument. And by the time I left, no qualifications were required. There would be no more "little by little" or "almost there." The setup is fantastic. The pick guard, strap button,  and end pin are installed. It's buffed to a shine bright enough to see your reflection.

Yesterday was the last class and I'm done.

I said in my last post that my impatience served me well this past week, and it's really true. I beat my head against a wall trying to figure the complicated set up process, but I got closer and closer. Enough so that every buzzing sound, every muffled note, and every out of tune chord was eliminated with just a few small suggestions from Ted. Most of the problems were solved by a few strokes of a file on the back side of the string slots in the nut. It took five minutes at most. And with a few more suggestions and the encouragement to lower the action (the distance between the strings and the neck) even more, I had it playing like a dream.

After coming home last night, I restrung it with good strings and played for quite a while. And I really couldn't believe it. This guitar is not a week old and the sound is incredible. Without a doubt, I'm biased. And I'm sure my judgement is clouded, but I was able to convince myself last night of this: I own six other guitars, three worth thousands of dollars each, and mine is not the least of them. Any guitar takes time to open up, and I won't even begin to know what it will sound like when it's mature for at least a year. But, according to Ted, there will be noticeable improvements in the sound even in the next week as the wood stabilizes and stretches out.

I've begun to wonder if the guitar I built won't wind up being one of the best I own. Like I said, I'm biased, and I know my opinion lacks objectivity. But that I'm even asking the question is absolutely amazing to me.

So that's it for now. I'll play my guitar for a couple of months, then I'll start it all again in January.

For the record:
Date started: September 7, 2010
Date completed: November 22, 2011

Monday, November 21, 2011

FINISHED! (Sort of).

The Harris D-8
After more than fourteen months of Tuesday classes and weeks of agonizing anticipation, the day finally came. The slots for the bridge pins had been carefully placed, the frets leveled and polished, and the time had come to string it up. It took longer than I expected, but before long I was tuning up that last string.

The big moment had arrived. Time for the first beautiful notes from my new guitar, and......THUD! It sounded like crap. Not just a little like crap, but a LOT like crap. It buzzed, it was nearly impossible to play, and it was out of tune. And that's the GOOD part.

I have to confess I wasn't prepared for it. I was prepared for not finishing in time to string it up. I was prepared for the likelihood that adjustments would be necessary. I was not prepared to be playing what was quite possibly the worst guitar I had ever strummed. Once again, I was being asked to exhibit a quality that I possess in quantities too small to measure: patience.

Damn.

But I'm getting there little by little, and I may have learned as much about guitars since I "finished" it than I did while I was building it. I've learned volumes about how the sound of a guitar is affected by minute adjustments in the bridge, the nut, and even the slots in the bridge where the strings are attached. I now have a new appreciation for the "set-up" technician, and I now know not to judge a guitar by how poorly it plays and feels without first checking all of those minor details.

I've made huge leaps in my knowledge of how to resolve those issues. It is not simple, I can tell you that. And truth be told, I think my lack of patience may have served me well in this case. Since I couldn't stand the thought of waiting to get Ted's help next Tuesday I learned by trial and error. I knew that the worst case scenario was that I would screw up my nut or saddle, either of which would cost a couple of bucks and a few hours at most. So I now know lots and lots about how NOT to set up a guitar and much more than I did last week about how TO set up a guitar.

So I'm feeling very, very good about it now. I actually spent more than an hour last night playing a guitar I built myself and while I was playing, I forgot the fact that I built it more than once. I take that as a huge victory. It still needs lots and lots of work. It isn't anywhere close to playing and sounding the way I want it to. But I'm finally ready to say it: I think it's going to be a really, really good guitar. The quality and balance of the sound is fantastic. It has excellent volume and projection. And those things will only get better as it opens up, which will take months and years.

With luck, this coming Tuesday will be the last class I need to clean up the rest of the details. I may need to continue tweaking for a few weeks, but anything other than tweaks should be behind me. Then I'll take a break and play my guitar until January. Then it's time for round two - the archtop.

By the way, most every guitar has a model number, so I decided to call mine the Harris D-8. As with most guitars, the letter refers to the body style (in this case, a Dreadnought). The number usually refers to the degree of fanciness of the inlay and binding. But I decided to number mine after Joe Morgan, second baseman for the Cincinnati Reds during their "Big Red Machine" heyday in the 70s, when Little Joe was my hero. I wore his number on my little league uniform. I always loved Joe Morgan because he was little, but he was still powerful and quick on his feet. That's what I want my guitar to be like.

Saturday, November 12, 2011

Close, But No Cigar

Almost.
So close and yet so far. Agonizingly, tantalizingly, close. But everything has a time, and today was not the day.

I went to a Saturday class today to try to get closer to finishing, and I had it in the back of my mind that I might actually get to string it up today. And it turns out that I came much closer than I thought I would. As a matter of fact, I could have done it if I had stayed another hour. But after almost four hours I was starving and starting to make mistakes. And the last thing I wanted was to get that close and screw it up.

But I made great progress today. I got the rest of my frets laid and the tuners attached, made some progress on the nut and saddle, and even did the final sanding on the top. So there's no doubt about it. I'll be playing that guitar on Tuesday. Those small remaining details will probably keep me busy for a week or two, but that's it.
Hooray.

Wednesday, November 9, 2011

Down To The Wire (Literally)

13 more frets. 6 tuners. 6 strings.

Preparing the frets
That's all that is standing between me and a guitar I can play. And the moment of truth is nearly at hand because, barring some unforeseen catastrophe, I'll be putting strings on it in my next class. What happens after that is a mystery but, with luck, I'll be spending more time playing it than I am adjusting it. But only time will tell.

Last night's class was a very productive one. The first big task was to level the fretboard and to clean up the binding that runs along its edge. It was mildly monotonous, but after six straight weeks of sanding it was a breeze. And the sanding requires a little special care, since the fretboard is radiused (meaning it has a slight arc from one side to the other rather than being flat). After finishing the sanding and cleaning out the fret slots, it was time to move on to the frets.

Fretting a guitar is an especially interesting process. Even after 40 years of playing the guitar, I really had no idea how a fret is attached or even what the whole thing looks like. It turns out it's a pretty complicated little piece of wire. It's basically a "t" shaped piece of wire with a rounded top. The rounded part is the part you see when you look at a guitar and the "t" is the part that is inserted into the slot on the fretboard. The "t" part has barbs running along its length so that it grabs the wood when it's hammered in.

Magnified close up of a fret
But it's not that simple. The fret extends from the fretboard to the edge of the binding, so a small portion of the "t" needs to be cut away from the rounded top part at each end. This requires a special tool and lots of precision. In addition to that, the fretboard gets slightly wider as it goes toward the body, so each fret is slightly longer, meaning each one has to be measured individually, and then carefully clipped before hammering in. As is almost always the case with guitar building, it's the preparation that takes most of the time. When it comes time to actually hammer the frets in, it goes pretty quickly. I could have easily finished in 20 minutes or so, but it was already 10 minutes past the end of class time so I had to save it for later. I should be able to finish that quickly in the next class. Then I'll just need to level the frets and file the ends down.

Then it's just a matter of attaching the tuners. The difficult part has already been done, which is preparing the holes in the head stock. Now that that job is behind us, it's simply a matter of fitting the tuner parts into the head stock.

The Collings and the Harris getting acquainted
I will then have a guitar. A few cosmetic details will remain, like the pick guard, truss rod cover, and strap button, but it will be ready to play without those things. Then it's just a matter of adjusting.

So the word has been delivered from upon high: We WILL be stringing up guitars next week.

I brought my guitar home this week, not because I'm going to do any work on it here, but because I can. And I have it hanging up in my music room right next to my Collings and it looks like it belongs there. By the way, the color of my guitar is about the same as my Collings (on the left) was when I bought it ten years ago. The wood will darken gradually, although my new guitar has an Adirondack Spruce top as opposed to a Sitka Spruce top, so it will be a little redder in color when it ages.

So, to sum it all up: Wow.

Wednesday, November 2, 2011

The Final Weeks

Masking before gluing the bridge
Well, it was almost two months ago that I proclaimed, "the end is nigh!" I'm not sure of the precise definition of the word "nigh" but I'll admit that it probably refers to a period of time shorter than two months, so one should always maintain a healthy skepticism when I make such statements. Having said that, I am almost finished!

Last night I did a little bit of touch-up sanding on the top, but spent most of my time gluing the bridge on the guitar. And, as is the case with many parts of the process, it's substantially more complicated that you might think. For one thing, the placement of the bridge is absolutely crucial, so great care and many, many measurements are taken to ensure its precise location. If it's out of place, nothing can be done. It won't play properly and, worst of all, it won't ever be in tune. So I spent a good bit of time working with Ted to make sure it was perfectly set before moving on.

After setting the location, holes for the strings need to be drilled. It's a fairly simple process so I won't go into detail. The small holes I drilled yesterday will eventually be bored out to their full size so that the bridge pins fit into them, but the purpose now is to establish the proper placement of the holes.

Scraping off lacquer before gluing the bridge
The next step is to mask the area where the bridge will be placed with tape and to then trace the shape and location of the bridge. The tape in that area is then cut and removed so that the lacquer in just that area can be scraped away, leaving a wood surface to which the bridge can be glued. And after countless layers of lacquer, it's not as easy as it sounds. Then the bridge is glued and clamped.

By the way, if you're interested in milestones, I'm pretty certain that's the last glue I'll use on my guitar. I might be missing something, but I think it is.

So I am really running out of tasks. The biggie is the frets, although I've been told that's a job that can be easily completed in one class. The tuners need to be attached, but the holes are already ready, so that's simply a matter of drilling two small holes for each tuner and screwing them in. The nut (the piece of material that holds the strings as they pass from the headstock to the neck) needs a little work on the slots. The pick guard needs to be attached, which should take a good five minutes. And then comes the stringing and adjusting.

Clamping the bridge after gluing
It looks like the odds are very good I'll be bringing my guitar home on the 15th or 22nd. It might even have a few small things left, but they should be things that can be done out of the shop. So two or three more weeks looks most likely. Maybe four, but I doubt it.

And another sign that we're almost finished: My class (with two additions) huddled last night to plan the purchase of wood for our arch top guitars, which we will start building on Tuesday, January 24th.

You must be relieved to know you get another 14 months of my blog. Lucky you.

Tuesday, October 25, 2011

I Could Sand Some More (But Maybe I'll Just Eat Glass Instead)

The box after buffing
I found it hard to believe, so I went back to my photo album to confirm it. I started lacquering and sanding on August 30, 2011. Today is October 25, 2011 and, at long last, the deed is done. It's true that we took two weeks off to let the lacquer cure, and I think I worked on a few other small things here and there. But there is no disputing the fact that the vast majority of my last six classes were spent sanding. That's 18 hours. 18 hours of mind-numbing boredom (as opposed to the other kind of boredom, which is exhilarating).

But as is true with many things in life, with great suffering comes a great reward. And the 20 minutes or so it took to buff that guitar to an incredibly beautiful shine made it all seem worthwhile. It's amazing.

Now that the sanding is complete, it's warp speed again. It was only minutes after finishing the buffing that I was gluing the neck on my guitar. Let me repeat that: I was gluing the neck on my guitar. Lest the significance of that step be lost, I'll just point out that the next time the neck comes off that guitar will be when it's being reset and, with any luck, that won't be for a couple of decades. So there is no longer a box and a neck. There is only a guitar.

Our class's speculation on the date of completion is becoming more finely tuned. The general consensus now is that it will be before Thanksgiving, although it's not guaranteed. And if all goes well, it could even be a week before that. All that's left is cutting and hammering in the frets, attaching the bridge and tuners, and then stringing it up.  And the most convincing piece of evidence of all: Ted said that I probably won't need strings next week, but I should bring a couple of sets just in case.

Gluing the neck 

Unbelievable.

So here's what needs to happen for me to have a guitar that I built myself: 1) I need to stay away from heart attacks, rabid dogs, and lightning bolts for a month or so. 2) I need to refrain from doing something horrible like dropping my guitar on the floor; and 3).......uh....ummm.... There is no 3.

That number 2 is the big fear (and don't discount it - I've seen it twice in the last year). So keep your fingers crossed and I'll try to keep a tight grip.

Saturday, October 8, 2011

Yes, I am a patient man. Yes, I am a patient man. Yes, I am a patient man.

A picture of our yurt, since a picture of sandpaper is boring
Would you believe me if I told you I could tell the difference in grades of sandpaper by looking at it? Well, I ought to be able to, as much time as I've spent with it lately. So I'll admit I've had about all the enlightened self-reflection I can handle. Sanding does that to a person. I'm done. Finished. Had enough.

But there's more to come.

We're taking a couple of weeks off for the first time since class started. We're at the point now that the guitar needs to sit and cure for a while before doing the final sanding. And I know you've heard me say this about a dozen times, but it appears that the final countdown is coming closer and closer. The next time we get together the goal is to glue the necks on by the end of class. Then it's frets, bridges, tuners, and setup. By all accounts, we should finish by early November. But we'll see...

So there's not much else to say. It's gets prettier every week. The sanding really pays off (very, very, very slowly). I am a patient man. Yes, I am a patient man. Yes, I am a patient man.

Thursday, September 22, 2011

Good Things Come To Those Who Wait

After sanding, before another coat of lacquer
I was right about one thing: There aren't many things left to do to my guitar. What I failed to fully appreciate is the length of time those things would take. So I trudge, trudge, trudge along. And when you see my guitar, I hope you'll pay special attention to its lovely lacquer finish, because I can tell you it doesn't come easily.

I've done little but lacquer and sand, lacquer and sand, lacquer and sand for the past month, and it will continue for several more. It's to the point now that we don't have enough to do to fill the full three hour class, and we're even planning to skip a class or two to give the lacquer a chance to fully cure before applying the next coat. So in an effort to end my habit of making wild miscalculations about when I'll be finished, I initiated a debate on the issue at our last class. The consensus (with the blessing of my teacher, Ted) is for the last week of October or the first week of November. Or at least that's when the building of the instrument will be finished. The set-up of the instrument is anybody's guess. I've seen it myself over the last year as students with finished guitars come back to work on their set-up. For some, it's ready to go right away and for others it's weeks or months of adjustments to get it right. So we'll see.

Taping the fretboard before lacquering
But let me be clear about my work lately: There is nothing fun, interesting, or rewarding about this very, very long part of the process. It's the same every week. End the class by spraying a new heavy coat of lacquer on the box. Come back the next week and spend more than 2 hours wet sanding (spraying it with mineral spirits and sanding with very find sandpaper). The purpose of this mind numbing labor is to fill all of the wood's pores, leaving a glass-like finish. And I wasn't kidding when I said it before: it comes at no small price. It's not an exaggeration to say that when all is said and done, nearly 10% of the time building the guitar will have been spent on lacquering and sanding the lacquer. It's an incredibly tedious job, and one that has few immediate rewards, but it looks more beautiful with each passing week. If the tedium ever ends, it will be a beautiful thing to behold.

So it's down to finishing lacquering and buffing, attaching the neck, mounting the bridge, attaching the tuners, and setting it up. With luck, six weeks will do it.

But don't quote me on that.

Tuesday, September 6, 2011

The end is nigh

I seem to be running out of things to do to my guitar. There should be no doubt that even considering that I'm almost finished will bring enough bad luck to add a few weeks to the process, but it's getting harder and harder to imagine how it could take much more time.

I've been busy the past few weeks with lots and lots of detail work. All the parts of the guitar are now constructed. So from here on out it's a matter of making them pretty, fitting them together, and then hoping it sounds good when you put strings on it (and then doing lots and lots of adjusting when it doesn't).

I began this process exactly one year ago today so, by my calculation, that's roughly 150 hours spent building a guitar. And considering I've probably spent 150 hours watching reruns of bad TV shows and another 150 hours doing laundry, I consider the time especially well spent.

By the way, in case you're wondering, the balloon keeps the spray lacquer from getting on the inside. How ingenious.


Tuesday, August 16, 2011

Everything But The Bridge

Today I got to see what my guitar is going to look like for the first time. The bridge and the tuners are still missing, a few minor repairs are needed, and hours of sanding and detail work remain to be done, but this is very close to what it will look like when it's finished.

I also finished shaping the neck today, and I love the feel of it. It's an amazing experience to shave away wood with a rasp, knowing that each stroke brings it just a little bit closer to its final contour. There is a point at which no measurements are taken and progress is gauged only by the the way it feels in your palm, its heft, and its shadow as you hold it up to the light.

And the amazing part is that, as you progress, your goal becomes obvious. Its shape becomes clearer and clearer, and it reveals itself.


Sunday, August 14, 2011

This Is Beginning To Look Strangely Like A Guitar

Completing the neck
This is getting downright thrilling. There have been many periods in the building process that have gone at a snail's pace. Sometimes a month or six weeks would go by without feeling like I accomplished anything, but this is definitely not one of those periods. It seems as though every time another minute of class time goes by, another big milestone is passed. I'm not naive enough to think that will continue - there will undoubtedly be plenty of opportunities for whining and frustration down the road - but it's harder and harder to avoid the fact that, while I still can't predict a date that I'll have a finished guitar, it's only a matter of weeks before I will have something assembled that any reasonable person would call a guitar. Once that happens, the rest is lacquering and tweaking and, based on what I've seen from students in past classes, that could be a few weeks or it could be a couple of months. We'll see.

I went to my regular Tuesday class this week, then joined the Saturday class to do a little catching up, and I'm sure I haven't made as much progress in a single week since I started almost a year ago.

At this point in the process there are many small projects that are going on at the same time, unlike earlier when we might spend a month or more on a single task. Over the past two classes I've worked on gluing veneer to the head stock, cutting and planing it to the proper shape, attaching the heel plate (more on that later), carving the neck, and several other things. And each of these little parts contribute to a very rapid pace in the evolution of the guitar.

Carving the neck joint
One project that I'm sure is pretty dull to read about, but I find interesting, is the addition of the veneer to the head stock. Three very thin sheets of veneer - two of walnut and one of maple - are glued onto the back of the head stock, reaching all the way to the intersection of the neck. After they dry, the neck joint is then carved, exposing the maple veneer in the form of a decorative line. When carving it, it's possible to manipulate the width of the line by changing the angle of the cut, which has the effect of exposing more or less of the veneer. And of course the veneer forms a line all the way around the head stock if you look at it from the side. The line is still very rough since I'm not finished carving it yet and it's a lousy photo, but you  can get a sense of it in the picture at right.

Speaking of carving, I think it might be my favorite part of building the guitar so far. Much of the process of building the instrument is making exact measurements and precise cuts, but the carving of the neck allows lots of freedom of interpretation. Obviously, certain dimensions have to be maintained, but a lot is left to the imagination. The shape of the heel where the neck meets the body, for example, or the contour of the line I just mentioned, are things that are left to the eye. And I really love using the rasp file to move a little here and a little there until it's just the way I want it.

Cutting the head stock to shape
Another very exciting step this week was finally starting to cut the head stock to shape. I've bored you with enough details in the post already, so I'll be brief. It takes a little imagination to picture the final product when all you have is a shape drawn on a rectangular face plate with a pencil. But when you start to cut it to shape it's exciting to see it come closer and closer to what you've envisioned for months. First, you cut away the excess with a band saw, then use a spindle sander and a hand plane to finish the rest of it. The only thing left to do now is to cut the arc on the top. Ted urged me to leave it for now because he says it will make some of the other final steps easier with the top still squared to it can be used to stabilize the neck when working on it. But I think he really just wants to torture me.

I could go on and on about other amazing feats of guitar building, but I'd be surprised if I haven't lost you already, so I'll save those for later. In the meantime, all I can say is the feeling I have right now is like the feeling I had when I was a kid going to the ballgame or the fair. I'm just practically jumping out of my skin to get to that guitar. And it just feels soooo close.


Saturday, August 6, 2011

Bridges, Plates, Stocks, and Dots

My bridge after the final shaping
Where to begin?!...It's been a busy couple of weeks, and we've made lots of progress. It feels as though we spent a month doing a little of this and a little of that and now, suddenly, all these little parts and pieces are  being put together in the shape of a guitar. And that very faint light at the end of the tunnel I talked about in my last post is getting a lot brighter in a big hurry. It's hard to say exactly when I'll be done because some factors are just too difficult to predict, but I'd say it's a good bet that you'll still be able to find a good homegrown tomato when I play it for the first time.

There are just so many parts of the project to talk about that even those of you who read this blog regularly (and are therefore obviously genetically predisposed to tolerating intense boredom) might nod off into your soup if I went into all of it. So I'll just give the thrilling highlights.

We haven't progressed much further on carving the neck, but we've made enough progress there that the rest of the work should go quickly. But we have made some important progress on other parts of the neck, including gluing the face plate onto the headstock. (As a reminder, the face plate is the part where the name of the instrument goes). The face plate is attached to the headstock and eventually the tuners will be attached there.

Attaching the face plate
The process is pretty straightforward. The face plate is a large rectangular piece of wood much larger than it will be when it's finished. So after sanding it to the proper thickness, the required length is calculated by measuring the end of the fretboard, then cut to the proper size. It's necessary to sand the end of the piece of wood at a 15 degree angle so that it will conform to the shape of the neck where it meets the head stock when it's glued. (You'll notice that a guitar's headstock is angled back about 15 degrees from the plane of the neck).

Then comes the fun part. Since we're not going to have a headstock that's 6 inches wide, it's time to decide what shape the headstock will be. And I have to say this was (and still is) a tough decision for me. There are lots of options, and if you've looked at many guitars you've probably seen a good number of them. In the end, I narrowed it down to a design similar to a Martin headstock, which is a very simple rectangular shape, and one designed by my teacher, Ted, which is quite a bit wider and has an arc on the top. I decided to go with Ted's, but I must confess I'm not sure I'm going to stick with it. I've already drawn the shape on the face plate and glued the face plate to the headstock, but it hasn't been cut yet. So I may yet change my mind. That's a decision for next week, I guess.

After gluing the dots
The other fun parts were drilling the holes for the fretboard dots and gluing them in and finishing the shaping of my bridge, both of which also required some artistic decisions. I'm happy with my choice on the dots, which is a little unusual, since I used much smaller dots than most people, but I think it's a good choice. I couldn't decide between the traditional setup, which is regular sized dots laid out in the traditional way, and no dots at all, which is like my Collings. I think my choice is a good middle ground and I'm very happy with the way it turned out.

The bridge turned out well, too, although I found a small little problem in the end. I was very happy with the shape when I finished  it until I realized that one side was shaped slightly different than the other. It's not glaringly obvious, but it's easy to see once it's brought to your attention. But then I thought about what my dear old Dad would have told me. First, he would have cautioned that trying to continue working on getting both sides perfect could very possibly wind up in "chasing it" as they say, and ruining what is good about it. And, besides, as he would have said, "that's how you know it's hand made." And if it's good enough for Pop, it's good enough for me.

Wednesday, July 20, 2011

A Very Faint Light at the End of the Tunnel

Fitting the fretboard to the neck
I seem to remember saying not too long ago something about how quickly everything was falling into place. Well, never mind. You may have noticed that I haven't posted anything to my blog in over a month, and that's mainly due to the fact that there hasn't been much to talk about. I've been working diligently, but the progress has seemed very, very slow. But I have a sense that feeling is about to end. In fact, it already has. Case in point: yesterday I held in my hand something that looked and felt very much like the neck of a guitar. It may seem a small accomplishment, but when you look at a completed box while holding a neck that's getting closer and closer to completion it's not hard to imagine a finished product. So there is a light at the end of the tunnel. It's a very faint light I admit, but it's definitely a light.

So to recap the past month or so, most of my time has been spent fitting the neck to the box, a process that requires lots of small adjustments and, due to a minor problem in fabricating the neck blank, a few small repairs. Once that very important step was completed, we moved on to the neck.

There are many steps involved in building the neck, including fitting the carbon fiber rods and truss rod into the slots we cut earlier, roughing out the shape of the neck by cutting away most of the extra wood from the neck blank, gluing in the carbon rods, and gluing the binding and purfling to the fingerboard.

Carving the neck
After finishing those steps the pace of progress sped up considerably. In the past two classes I glued the fingerboard to the neck, trimmed the binding so that it's flush with the fingerboard, shaved the neck blank to conform to the shape of the fingerboard, and began one of the most important tasks of the whole building process: carving the neck.

For guitar players, it's not necessary to explain how important it is to have a comfortable neck. It is the most important factor in how it feels to play the instrument. Another way to put it is that the body is the most important component in how the guitar will sound, but the neck is the most important component in how it feels to play, and unlike many of the features of a guitar, it's a very personal thing. Some players like thick chunky necks, some like narrow ones, some are the same width and thickness throughout, and others' dimensions vary from one end of the neck to the other. There are also variations in the shape of the neck that are important to the way they feel and play.

I started the process of carving last night, and I'm very happy with my progress so far. I have very particular ideas about the shape and dimensions I'm after, but I haven't gotten to the point of having to worry about them yet. So far I've only been working on carving away as much excess wood as possible and getting it close to the final shape I'm after. You've probably heard the old saying about the master craftsman who builds duck decoys. When asked how he goes about his work, he says, "I just take a chunk of wood and carve away everything that doesn't look like a duck." This is a very similar process, I think. I'm taking a chunk of wood and carving away everything that doesn't feel like my guitar neck.

Cutting out the bridge
My bridge is also in the works and I've made little bits of progress on it here and there. For the uninitiated, the bridge is the piece of wood connected to the top of the guitar to which the strings are attached. It's made from ebony, so I started with a rectangular piece with holes drilled for the strings. After deciding on the shape I wanted I cut it out roughly and am now working on carving, filing, and sanding it to its final shape and dimension. With luck I'll be able to finish it in the next couple of classes. And the light will be just a little bit brighter.

Wednesday, June 8, 2011

One Guitar Box Down, One Neck To Go

Fitting the neck to the box
After nine months, my box is essentially finished and now it's time to focus on the neck. I still need to attach the bridge, do a little more sanding and complete a few cosmetic touch-ups, and of course it still needs to be varnished but, other than that, it is what it is. There's nothing left to do to it that will make it sound any different than it would right now, so that ship has sailed. It sounds great when tapping it, so let's hope that translates into a great sounding guitar.

But I'm focused on the neck now and I made a  good bit of progress this week. We took several small but important steps, including fitting the neck tenon to the mortise in the box. Needless to say, getting the right fit is extremely important, so it's a matter of calculating the proper angle of the neck in relation to the body and then chiseling and filing the tenon until the neck and box come together properly. After this week's class, I was able to  get very close to a final fit, but there will be many adjustments and tweaks made as I work on putting together all of the pieces of the neck and finally bolting it on.

Shaping the neck tenon
In addition to fitting the neck to the box, we worked on fitting the fingerboard to the neck blank. This involves first cutting channels for the carbon fiber rods in the fingerboard to match the channels we cut in the neck blank earlier. You can see in the picture at the bottom of this post how the rods run the length of the neck. It's more difficult to see that the rods are set in the channels of both the neck and the fingerboard, bringing them all together into a solid unit. Eventually they will all be glued together. And, as you can see, there is one remaining channel, which is where the truss rod will be inserted.

After cutting the channels, the fingerboard was cut to the proper width, a very important step that required an even more important decision: In order to cut the fingerboard to the proper width, it's necessary to decide how wide the neck will be at the nut. Guitars vary widely in neck width depending on the style of guitar, but even within a particular guitar type there are variations. Most Martins have a neck width of 1 and 11/16th inches, but I chose to make mine slightly wider at 1 and 3/4 inches. That's only a sixteenth of an inch wider, but it makes a pretty big difference in the feel of the instrument. It's the same width as the neck of my Collings OM-3 and I plan to model my neck after it since it's the most comfortable of any I own.

The last task we completed was to drill a hole in the neck tenon and glue in a maple dowel. Since bolts will eventually be inserted through the tenon and since the wood grain there is relatively short, the hardwood dowel is inserted to provide added strength.

Fitting the fretboard and carbon fiber rods to the neck
In the next couple of weeks, we'll work on the headstock (where the tuning pegs go) by cutting it to the proper angle and adding "ears." Those are pieces of wood glued to the either side of the neck blank. The headstock is wider than the rest of the neck, so "ears" are added to widen it. After that, we'll begin shaping the neck - a very, very important task. We'll also be bolting the neck on for the first time next week. It will be bolted on and taken off several times during the process, but bolting it on the first time is a big step.

And I almost forgot to mention that I brought my box home for the first time, which turned out to be a bigger deal than I expected. I brought it home to show Natalie and so I could do a few minor touch-ups at home before class next week, and it felt remarkably like a teenager bringing home a girlfriend to meet the folks for the first time. Fortunately, I think Natalie approved. And she didn't say a word when we went into my music room to spend some quality time together.

Not to exaggerate the significance of it - it's just a guitar, after all - but there is a feeling that comes from building an instrument like this that is tangibly different from any other feeling I've had. Because it's a musical instrument it truly feels like it has a life of its own - that it's more than just an inanimate object. It's just some pieces of wood shaped and put together, but it has qualities that are inherently its own that can't be changed by me. It makes me think that one doesn't really build a guitar - they meet it.

Wednesday, May 25, 2011

Binding, binding, and more binding

Gluing the binding and purfling to the top
It's been a few weeks since I last posted an entry because I've been working on pretty much the same thing since then. As predicted, attaching the binding and purfling was a long and exacting process, but not one I found tiresome. I actually enjoyed it quite a bit, in fact.

I've already described the process, so I won't go into much detail. It's simply a process of fitting sections of binding and purfling into the ledges I routed around the top and bottom. The pieces have to be bent to shape and  fit very precisely because the finished product won't hide many imperfections. It's one of the parts of the process that really separates a well made guitar from one that's not. The binding and purfling are both made of wood and are very thin (the purfling, in particular) so they're very delicate, and fitting them precisely without breaking them is no simple task.

Trimming the binding and purfling
But things went pretty well. There were a few challenges as there always are, but it all came together and I'm nearly finished now with only a little more sanding to do. I should explain that the first step is to glue the binding and purfling in. Then, after it dries it's necessary to plane the excess wood away so that it's even with the top and sides. Then it's sanded to finish. I've done all but the very final bit of sanding, which I should be able to compete quickly at the beginning of my next class.

I should also mention that there is a special thrill in getting the binding attached. When working on the top of the guitar early in the process, it's a very resonate piece of wood. You can really sense how it can turn into a beautiful sounding instrument. But once that top is attached to the sides, it becomes just a stiff piece of wood again and its resonant properties are really diminished. That is until the binding is attached. With that simple step, all of the wood pieces become one and they begin to resonate as one unit, and all of the work carefully carving the braces and fitting the pieces so carefully together pays off. There is still work to  do to get the box to its full potential, but adding the binding is an important and satisfying step.

After sanding the binding
We completed one other small task this week, which was to cut out our bridge blanks and rout the slot for the saddle. (For those who need some definitions: the bridge is the wooden piece at the bottom of the guitar to which the strings are attached. The saddle is a piece that sits in the bridge. The strings run down the neck, over the saddle and then connect to the bridge). The bridge is made from ebony which is, of course, very hard material. So we cut it in a rectangle to rough size, then we routed the slot. This is a simple but very important step since the saddle doesn't sit straight. It's angled slightly to compensate for the size of the strings. Soon we'll be cutting it to the proper shape and drilling the holes where the strings will go after it's attached to the guitar. But next up is the neck. The only work left on the body is to attach the bridge and do the final tap tuning of the top, which involves sanding small sections of the top and continually tapping to test the resonance of the instrument until the best sound is achieved. So next week we'll begin the process of shaping the neck and attaching the finger board and truss rods.


Wednesday, May 4, 2011

Focus, Focus, Focus

Fitting the binding
My guitar building teacher, Ted Harlan, is a very laid back guy. So when he tells you that you're about to perform the most difficult, detail-oriented task of the entire process, and that if you mess it up your guitar will look terrible, you're inclined to take notice. That's what happened this week.

It's rare that Ted is so direct in his instruction, but he actually gathered me and my classmates, Gordon and Bruce, at the beginning of class to emphasize how important it was for us to really focus during this particular step of the process. "Take your time. Make sure your tools are as sharp as possible. Relax and focus," he said.

This critical step he's talking about is the installation of the binding. And I think it says something about Ted's emphasis on fine craftsmanship that, while the binding is definitely important to the construction of the instrument, the part that he was concerned with is purely cosmetic. The issue is that the binding that goes around the top and back of the instrument intersects the binding that runs on either side of the end graft. On most guitars, the binding intersects in a "t", but we're actually taking the time to insert a tiny mitre so that the purfling turns the corner.  (In case you're not familiar with the term, a mitre is a joint that forms a corner). It's not necessary for any other reason than that it's beautiful and a sign of attention to detail. But to get it right is not easy.

I won't go into the details other than to say it's a process that requires very careful fitting of parts and a series of perfect cuts, any of which could ruin the joint if not done properly. The detail is so fine that, for me at least, magnifying glasses were an absolute necessity. I couldn't possibly see the detail needed without them. 

After fitting the binding to the top, but before gluing
I'm finished fitting the binding to the top now and I'm happy to say it's just about as good as I could hope to get. Almost perfect even. But I still have plenty of chances to screw it up when I work on the back next week. Once I have the binding for the back fit, I'll fit the purfling that accompanies it (a much easier process) and glue it all in. Unless I run into problems, that should all happen next week. And, get this: with that step, except for sanding and finishing, the construction of my box will be complete. Holy Toledo.

Going backwards now, I skipped over the previous week's class so I'll give the quick update on that one. We took two very important steps in building the neck. First, we cut the slots for the truss rod (that's a metal rod in the neck that can be used to adjust it throughout the life of the guitar) and two carbon fiber rods that are inserted to add strength. 

There are a couple of slightly unusual things about the construction of my neck. One is that it has a bi-directional truss rod, meaning it can be adjusted either up or down. Most truss rods only go one way. The other is the insertion of the carbon fiber rods, which is a relatively new development in guitar building.

The cutting of the slots is pretty simple. It requires some very detailed calculations, but once those are completed, the process is easy. The next step is to cut the neck blank out of the wood block that I glued the week before. Slots are cut in both sides of the block, because the block makes two necks - one for me and one for my classmate, Bruce. Cutting it out is also pretty simple. It's cut to the rough shape of a neck before I begin the process of chiseling, rasping, and sanding it, attaching the fingerboard, and getting it to the final step of attaching it to the guitar.

Little by little, step by step, progress is being made. And it's remarkable how fast the process seems now. Every week seems to bring exciting new developments and with every hour that passes I see a beautiful instrument taking shape. Now if I can just keep from messing it up!

The components of the neck
The box and the neck blank


Friday, April 22, 2011

Jigs, Mortises, Blanks, and Tenons

Placing the box in the jig
Suddenly it seems things are moving along very quickly. A few weeks ago I had a bunch of pieces of wood that didn't resemble anything really, much less a guitar. Now I have a box that looks very much like a guitar and I'm ready to attach the binding and purfling, which makes the list of things left to do to the box pretty short. And I've already begun work on the neck. Don't get me wrong, I'm a very long way from the end (or even the light at the end of the tunnel), but tangible progress seems to be coming quickly these days, and that makes it a lot of fun.
This week I made good progress in two areas. First, I routed the neck mortise (that's the slot where the neck is inserted). Like many things about building a guitar, it's a very complicated and difficult task made much, much easier by a jig, which you can see in the picture at left. It consists mainly of a slot on the top that guides the router bit as you cut a huge hole in your guitar. (You may remember me describing that feeling last week. It was just as cringe-inducing this time).

The mortise after routing
The difficult part is positioning the jig, since placing it even a fraction off can cause huge problems, like a guitar that won't play in tune, buzzes a lot, and sounds horrible (all things one would like to avoid). But after getting it in just the right place, the rest is fairly easy. And after several passes with the router, getting deeper each time, you have a beautiful mortise ready to receive what you hope will be an equally beautiful neck tenon. But first one must have a neck. That was the next job.

In creating a neck, the first step is to create a neck blank, which is essentially a block of wood in the rough shape of a neck. It has a big chunk at one end from which the neck tenon will be carved, a shaft that will be contoured to just the right shape for the fingerboard, and a flat part at the end where the headstock will go. But first the wood for the blank has to be prepared. We're using mahogany - Honduran mahogany, to be exact - which is typical for guitar necks. And although the slab of wood was big and thick enough to make a whole slew of blanks, it's not just a matter of cutting it to shape.

Gluing the neck blank
Since it's so important for the neck to be not only strong, but straight and resistant to warping, the slab of wood is cut to the right length, then cut in half along it's length. Then it's folded together so that the grain of the wood meets in the middle, which will make it strong and stable after it's glued together (as you can see in the picture) and clamped. Next week, I'll cut the blank out of the glued piece and begin shaping my neck.

So we're moving right along now and I'm actually starting to try to estimate when I'll be able to finish. This is obviously a mistake, but it's hard to resist. And no doubt by talking about finishing, making lots of progress, and tangible results, I'm tempting fate in the worst way. But as strange as it sounds (especially for someone like me with a well-deserved reputation for impatience) I seem to be in less and less of a rush. Over the past month or two I've come to realize that I really enjoy what I'm doing. It's tedious sometimes and often frustrating, but all in all a very good way to spend a few hours every week.

Wednesday, April 13, 2011

Zen and the Art of Guitar Building

It's been a couple of weeks since I posted an update, so I'll start with a report on last week's class.

I sanded. For three hours. Without stopping. The end.

And that's it for that post. It sounds mind numbing, I know, but I guess that's its charm. I can't say I'd want to do that all the time, but I admit there's something about going to class after a day at work and losing yourself in the most minute details. I've never spent much time meditating, but I have a feeling it has a lot in common with a three hour stint sanding the sides of a guitar (aside from the fact that meditating doesn't usually involve being covered with a film of rosewood dust).

Routing the binding and purfling ledges
And the important thing is that the outcome was good. The purpose of all that sanding was to smooth and even the guitar's sides in preparation for routing the binding and purfling ledges. The binding is the strip of material that is applied around the edge of the top and back to bind them to the sides and they also serve a decorative function. And the purfling is a decorative feature that is applied next to the binding. While the binding is one strip of wood, the purfling is several strips (3 for the back and 5 for the top) of thin strips glued together. The multiple strips alternate in color so that if you were looking at the top you would see walnut binding on the outside edge of the guitar, then five thin strips alternating dark and light color inside that.

So the job this week was to rout out the ledges for the binding and purfling to sit in. Since the binding is wider, it's necessary to rout once around the top and back for that ledge, then another narrower ledge on top of that for the purfling.

After routing the ledges
And let me just say this: taking a power tool and cutting big chunks of wood out of something you've spent the last seven months working on is NOT meditative in any way. I can think of a very specific way to describe the feeling but since my dear mother may read this post, suffice it to say that it's not for the faint of heart, especially for someone who can count the number of times they've used a router in their life.

But the job is complete, my guitar is intact, and I'm now ready to begin work on the binding and purfling. I'll start work on that task next week. And the final achievement this week was to rout the end graft. I wish I had remembered to take a picture because it was very satisfying and looks very nice. It would also really help in explaining exactly what it is. I'll try anyway. The end graft is a strip of wood at the very bottom of the guitar (where the strap button will go) that covers the intersection of the two sides. Like the binding, it has both a functional and a decorative purpose. Now that it's been routed, a strip of walnut about 1/2" wide will be inserted.

It won't be long before I'll be working on the neck. This thing might wind up with strings after all! Wonder of wonders.